Drywall Repair: 7 Easy Fixes
Small cracks in walls can make your home look old and poorly maintained. Fortunately, drywall repair is often a simple DIY project when the cracks are minor, stable, and limited to the surface. With the right tools and techniques, you can restore your wall and achieve a smooth, professional-looking finish without replacing the entire drywall panel.
Small cracks commonly appear around doors, windows, ceilings, corners, and drywall joints. They may result from normal house settling, temperature changes, humidity, or improperly finished seams. Before starting any drywall repair, it is important to understand why the crack appeared so you can choose the right solution.
This guide explains how to identify different types of drywall cracks, repair small imperfections, avoid common mistakes, and prevent recurring damage.
What Causes Small Drywall Cracks?
Understanding the cause of a crack helps you choose the correct drywall repair method. While many small cracks are cosmetic, others may indicate moisture damage or ongoing movement that needs attention.
1. Normal House Settling
Houses naturally settle over time as building materials adjust to changes in temperature, moisture, and structural loads. This movement can create thin cracks around corners, windows, doors, and drywall joints.
Small, stable cracks can often be fixed with joint compound and careful sanding. However, if a crack continues to widen or appears alongside other signs of structural movement, investigate the underlying cause before attempting a permanent drywall repair.
2. Temperature and Humidity Changes
Changes in temperature and indoor humidity can cause drywall and wooden framing to expand or contract. Over time, this movement may create fine cracks along seams and corners.
Maintaining consistent indoor humidity and proper ventilation can help reduce moisture-related movement. However, normal seasonal changes may still cause occasional drywall cracks.
3. Poorly Finished Drywall Joints
Drywall panels are joined using joint tape and joint compound. If the tape was installed incorrectly, the compound was applied too thinly, or the joint was not properly reinforced, cracks may eventually appear.
In these situations, applying paint alone will not provide a lasting solution. Effective drywall repair may require removing loose tape, applying fresh joint compound, and reinforcing the seam before repainting.
4. Water or Moisture Damage
Water leaks can weaken drywall and cause cracking, discoloration, bubbling paint, swelling, and soft spots. Common sources include leaking plumbing, roof damage, condensation, and water entering around windows.
Before beginning drywall repair, identify and fix the moisture source. Allow the affected area to dry completely. If the drywall has become soft, crumbly, swollen, or moldy, replacing the damaged section may be safer than applying a surface patch.
How to Identify the Type of Drywall Crack
Before choosing a repair method, inspect the crack carefully. Look at its length, width, location, and whether the surrounding drywall feels firm and dry.
Minor cosmetic cracks are generally narrow and stable. They often occur near joints, corners, ceilings, and openings.
Pay closer attention if you notice:
- A crack that keeps growing or widening.
- A large or unusually deep opening.
- Several cracks appearing suddenly.
- Water stains, bubbling paint, or damp drywall.
- Soft, swollen, or crumbling wall material.
- Cracks extending across different building materials.
- Doors and windows that suddenly become difficult to open or close.
These warning signs may indicate an issue that requires professional assessment rather than a basic drywall repair.
How to Repair Small Cracks in Drywall
For a small, stable crack in otherwise healthy drywall, you can usually complete the repair with basic tools and materials.
Step 1: Gather Your Drywall Repair Supplies
Before starting, collect the following materials:
- Lightweight joint compound or suitable drywall filler.
- A putty knife or drywall knife.
- Fine-grit sandpaper or a sanding sponge.
- A utility knife.
- A dry cloth or vacuum cleaner.
- Drywall joint tape, if needed.
- Primer suitable for drywall repairs.
- Matching wall paint.
- A small paintbrush or roller.
Having everything ready makes drywall repair easier and helps you avoid unnecessary interruptions.
Step 2: Prepare the Crack
Do not apply joint compound over loose material, dust, or damaged drywall paper.
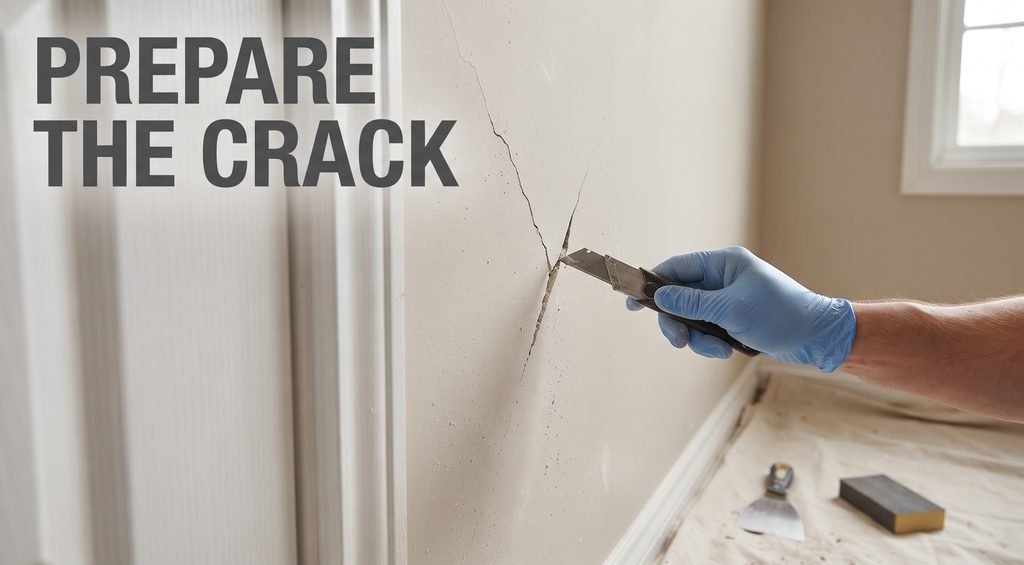
Use a utility knife or putty knife to remove loose compound and flaky material around the crack. For a very narrow surface crack, you may carefully open it slightly to create a clean area for the repair material to bond to.
Avoid cutting deeply into the drywall or damaging anything behind the wall. Once the loose material is removed, wipe away the dust with a dry cloth or vacuum cleaner.
The surface must be clean and dry before you continue with the drywall repair.
Step 3: Apply Joint Compound
Use a putty knife to spread a thin layer of joint compound over the crack. Extend the compound slightly beyond the damaged area and feather the edges so the repair blends into the surrounding wall.
Avoid applying one thick layer. Several thin coats are generally easier to control and are less likely to leave visible ridges.
Allow each coat to dry according to the manufacturer’s instructions. Drying time depends on the product, room temperature, humidity, and thickness of the application.
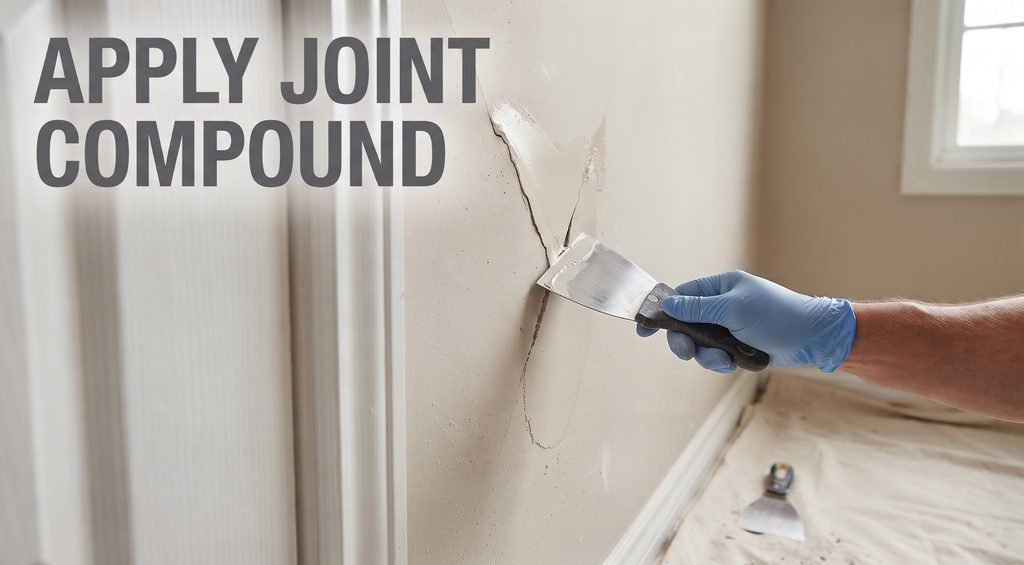
For a shallow crack, one or two coats may be sufficient. Deeper imperfections may require additional applications.
Step 4: Sand the Repaired Area
Once the compound is completely dry, sand it gently with fine-grit sandpaper or a sanding sponge.
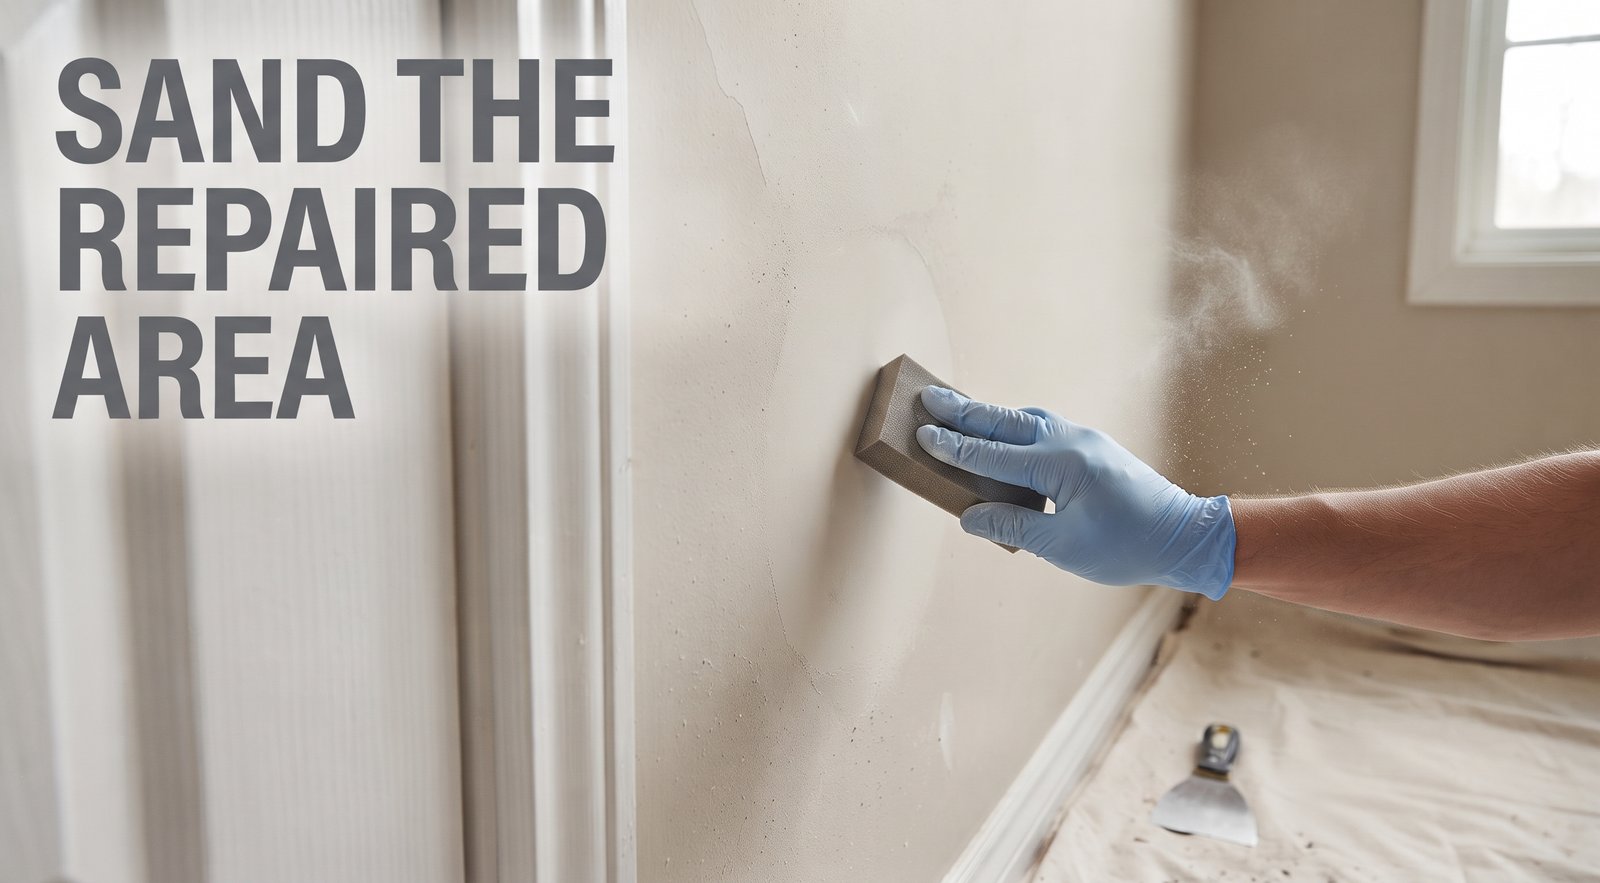
Use light pressure to remove ridges and smooth the edges. Avoid aggressive sanding because it can damage the drywall’s paper facing and create additional imperfections.
Wipe away sanding dust before applying another coat or moving on to primer.
If the repaired area still looks uneven, apply another thin coat of compound, let it dry, and sand again. Careful sanding is an important part of achieving a smooth drywall repair.
Step 5: Prime and Paint
Priming helps create a consistent surface because joint compound absorbs paint differently from the surrounding painted wall.
Apply a suitable primer to the repaired area and let it dry according to the product instructions. Then paint using a matching color and the same sheen as the existing wall.

For the best results, blend the paint carefully into the surrounding area. Depending on the wall color, lighting, and age of the existing paint, painting the entire wall may provide a more uniform finish.
If the wall has a textured surface, reproduce the texture before priming and painting.
How to Repair Cracks Along Drywall Joints
Cracks along drywall seams often need more than a simple surface patch. If joint tape has loosened, bubbled, or separated from the wall, the damaged section should be repaired properly.
Start by removing loose compound and damaged tape. Make sure the surrounding drywall is firm and dry before continuing.
Apply a thin layer of joint compound over the joint, then embed fresh drywall tape according to the tape manufacturer’s instructions. Smooth out air bubbles and remove excess compound.
Once the first coat has dried, apply additional thin coats, feathering the edges farther outward with each application. Allow the compound to dry completely between coats and sand gently when necessary.
Finish the drywall repair with primer and matching paint.
A wider, feathered repair usually blends more effectively into the surrounding wall than a small, raised patch. If the joint continues to crack, investigate movement, framing problems, or other underlying causes before repeating the repair.
Common Drywall Repair Mistakes to Avoid
Even a small patch can become noticeable if the preparation or finishing work is rushed. Avoid these common mistakes to achieve a better result.
Applying Compound Over Dust
Dust and loose material prevent joint compound from bonding properly. Always clean the damaged area before starting the repair.
Using One Thick Coat
Thick layers may dry unevenly, shrink, or crack. Apply several thin coats and follow the manufacturer’s drying instructions.
Painting Before the Compound Dries
Painting too early can produce an uneven finish and interfere with the appearance of the repaired surface. Make sure the compound is completely dry before sanding, priming, or painting.
Skipping Primer
Fresh joint compound absorbs paint differently from existing drywall. Applying primer helps reduce differences in color and sheen.
Sanding Too Aggressively
Excessive sanding can damage the drywall paper and create more work. Use fine-grit sandpaper and light pressure.
Ignoring Recurring Cracks
If the same crack returns after a drywall repair, do not simply cover it again. Check for ongoing movement, loose joint tape, moisture problems, or other causes that may need attention.
How to Prevent Drywall Cracks From Returning
Although some movement is unavoidable, a few practical steps can help reduce recurring cracks.
- Keep indoor humidity reasonably consistent.
- Repair plumbing leaks and roof leaks promptly.
- Use appropriate drywall tape and joint compound.
- Allow compound and primer to dry fully before applying the next coat.
- Ensure damaged or loose joint tape is properly replaced.
- Monitor cracks that repeatedly appear in the same location.
Preventive maintenance cannot eliminate every crack, but it can reduce the likelihood of moisture-related damage and repeated cosmetic repairs.
When Should You Hire a Drywall Repair Professional?
Not every crack is suitable for a DIY solution. Consider professional advice if the crack is large, continues widening, repeatedly returns, or appears alongside other signs of building movement.
Professional assessment is particularly important when you notice significant ceiling damage, displaced wall surfaces, extensive water damage, or doors and windows that suddenly stop operating correctly.
If moisture is involved, repair the source before replacing or patching the drywall. Damaged material may need to be removed rather than covered.
You can photograph a crack and measure its width periodically to check whether it is changing. This information may help a qualified contractor or structural professional evaluate the problem.
A professional drywall repair service can also help when the damaged area is extensive, the wall has a difficult texture, or you need a seamless finish across a large surface.
Frequently Asked Questions About Drywall Repair
How do I fix a small crack in drywall without replacing it?
A small, stable crack in healthy drywall can usually be repaired with joint compound or an appropriate drywall filler. Clean the crack, remove loose material, apply thin coats, sand the surface, and finish with primer and paint.
If the drywall is wet, soft, crumbling, or extensively damaged, replacing the affected section may be necessary.
Should I use caulk or joint compound for drywall cracks?
Joint compound is generally suitable for cracks on ordinary drywall surfaces and seams. Flexible paintable caulk may be useful in certain areas where small amounts of movement are expected, such as some trim-to-wall gaps.
Choose a product designed for the location and type of crack. If the crack reflects ongoing structural movement, address the cause instead of relying on filler alone.
Why does my drywall keep cracking after repair?
Recurring cracks may result from seasonal movement, poor joint-tape installation, changes in humidity, moisture damage, or movement in the building structure.
If a crack reappears after a properly completed drywall repair, inspect the area for loose tape, moisture, or continuing movement before patching it again.
Do I need primer after repairing drywall?
Yes, priming the repaired area is generally recommended. Joint compound absorbs paint differently from existing painted surfaces, which can make the repair visible.
A suitable primer helps create a more consistent finish before you apply the final paint.
How long does drywall repair take?
The hands-on work for a small crack may take only a short time. However, the complete project can take longer because joint compound and primer need time to dry.
Repairs involving several coats, joint tape, textured finishes, or multiple damaged areas may require more than one day.
Can I paint directly over drywall compound?
It is best to prime the compound first. Applying paint directly over untreated joint compound may produce an uneven appearance because the repaired area absorbs paint differently from the surrounding wall.
Allow the compound to dry completely, sand it smooth, remove dust, and apply primer before painting.
Conclusion: Get a Smooth Wall With Proper Drywall Repair
Small cracks do not always require extensive renovation. With careful preparation, suitable joint compound, light sanding, primer, and matching paint, many minor drywall imperfections can be repaired successfully at home.
The most important step is identifying the cause before starting the repair. Stable surface cracks can often be handled with basic DIY techniques, while recurring cracks, moisture damage, and signs of structural movement may require further investigation.
By choosing the correct materials and following the right process, you can achieve a clean finish and reduce the chances of the same problem returning